Showing posts with label Alpaca yarn. Show all posts

Monday, January 16, 2012

Snow

It snowed this weekend in Seattle.  I was running errands on Saturday and literally turned the corner and snow began coming down.  Hard.  I think we have a couple of inches, which is no big deal in much of the country, but it can be a bit snarky here.

I am not snow's biggest fan.  I figure that I can drive a couple of hours and visit it in the mountains if I really want to see it.  Which I do - every 5 years or so.  But if it is going to coming visit me then I should make the best of it.  My new banner, celebrates the snow and the witch hazel in bloom in the front yard.  A little bit of hope for spring peaking out from under the snow.

I had planned a different post, but let's go with the snow theme.  Since the beginning of the year I've been working on (wait for it...) another stranded knitted hat.  I used Mountain Top Vail for the cream which is 70% alpaca and 30% bamboo.  The green is  Malabrigo Lace, which is I doubled.  It is 100% merino wool, which feels heavenly.  I used a US 1 (2.5mm) circular needle.


The entire project took about  2 weeks, including commute time on the bus.


When finished I washed and felted it lightly which helped even out a few wonky stitches.  It is soft and light weight.  Perfect for a snowy Seattle day.

Sunday, January 8, 2012

Another Stranded Hat

I had sooo much fun with my first stranded knitting project I began another right away.  It was as much fun, but I ran into issues.

The good news?  My tension improved.  Yes, the stitches were larger than straight knitting, but they were consistently big.

The not so good news?  I cast on way too many stitches.  This bad boy could have fit Lincoln at the Lincoln Memorial in Washington, D.C.

See what I mean?  Humongous!  Pattern is cute, but good grief it was big!


I used my 'go to' cure for all my wonky knitting issues.... felt it!  It shrunk considerably but was still very, very large.   While it was still damp, my sister-in-law popped it in the dryer.  That helped a little more.  Still big, for me anyway, but no longer unwearable.

And the end result?


What?  You thought it was going to look like every other hat walking down the street?  Nooo.   My sister-in-law asked for tassels, and there you go.  Tassels.  Adds a certain whimsy, don't you think?


Pretty darn cute, if I do say so.  And found a new home with my sister-in law in Alaska.  She was a huge help in salvaging this project. 

Learned a BIG lesson on double checking one's math before casting on. 

Monday, January 2, 2012

Finished - Stranded Knitting Hat!

This project was a great deal of fun and I learned a ton about stranded knitting!

  1. It was not as hard as it looked.  Following the pattern is a lot like counted cross stitch.  If you can count to 20 and keep track of which line you're on in the pattern, you are in great shape.
  2. Find a way to hold the yarn that works for you.  There are a number of great videos on YouTube showing different ways to hold the different colors.  I settled on Continental, holding the yarn in one hand, a different color around two different fingers to better tension control.  There was a fair amount of trial and error involved.
  3. Felting the project at the end solved a world of issues (see item 2, above)... Like puckering and inconsistent stitch lengths.  It also made the fabric more dense and warm.
I think it turned out to be pretty cute.  Much cuter on my niece (but what isn't cute on a twenty somethings), but she wasn't available for the photo shoot.


This project was so much fun that I have completed another project, have one underway, and just purchased yarn for a third!

Thursday, December 8, 2011

New Project - Stranded Knitting

Things were a bit busy at work the last couple of months but have returned to something resembling normal recently.  For a while there was travel, travel, travel.  Fun, but very nice to be home again. 

I'm not a huge fan of being a girl and limiting myself to girl products that fit in a one quart zip lock bag, if ya know what I mean.  That part of travel rather cramps my style.  And you can only bring along sooo many shoes in a carry-on bag.  Kinda limits one's options. 

I did get a chance to work on a new project while I was away.  I decided to tackle stranded knitting.  You know, those lovely pieces using intricate patterns and two or more colors?  

Between YouTube and a great pattern book, I was on my way.  As an aside... I love YouTube.  It's not all stupid people tricks and revolutions.  I'm waiting for a video series on brain surgery.   That could be fun. Well, perhaps not. 

I found a book with great patterns at the library:  Poetry in Stitches by Solveig Hisdal.  I liked it so much that the Sweetie tracked down a copy for me.  So small task as it had been out of print for awhile.  Thank you, Sweetie.
Poetry in stitches: clothes you can knit [Book]
I was in love with several patterns in the book.  But the idea of taking on something as large as a sweater when I had no idea what I was doing seemed a bit daunting.  And what if I hated this technique?  I would have another UFO laying around, nagging at me.

I started smaller.  And cobbled together a pattern for a scarf from the Child' Cardigan and Cap pattern on page 112. 

Of course I needed more yarn.  Not really, but I went and purchased some anyway... some Classic Elite MountainTop Vail in a light gray and cream.  Hey, I don't name these.  It's a blend of 70% alpaca and 30% bamboo.  It is a fingering weight yarn, which is more fine than I had used to date, but it is so soft I just had to have it.  The purple is Plymouth Baby Alpaca Lace.  Again, super soft.


I was off to the races.  I had a pattern, yarn, a new circular needle, and time to kill in airports.  I am more patient and tolerant traveler when I have a knitting or crochet project with me.  Which is good for everyone.  Just sayin'

In my next installment (not two months from now, I promise) I'll fill you in on how my project progressed.

Monday, October 10, 2011

Yup! Another Gnome Hat

I can't just help myself.  I just love making these. 

This is hat #3.

They are quick. 

I don't have to think very hard. 

I can work on these at o'dark hundred on the bus to work, and on the ride back home.  I only have about a half hour with a lot of jostling, so my projects can't be overly complex or too big. 

These goofy little hats are just perfect!

And they make me smile


I used my favorite yarn - alpaca.  With a little felting, this hat became yummlisicous softness (just made that up).

Thank you for indulging me.

Monday, September 12, 2011

Elf Hats in the Garden

This post is not really about elf hats in the garden, but I thought it was a fun way to start.

I have been plugging away on a sweater made of Mohair and Silk.  The yarn is lovely, but it is a bit of a slow go.  And sometimes I have a short attention span when it comes to projects like this.  So I start another.  Which partially explains why this particular sweater is such a slow go.

Anyhoodles, I started another gnome/elf hat sometime last week with leftovers from another project.  I need to make the case that I am running out of yarn, before I can buy new.  The Sweetie is starting to give me funny looks when he sees I have snuck more yarn home from the store.  (I don't really think he understands how this stuff literally calls out your name and jumps into your bag!).

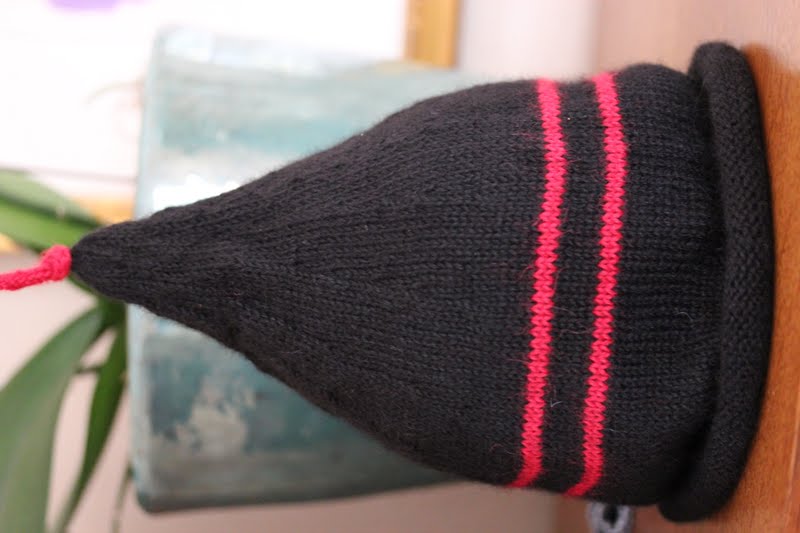
This is an elf hat.  I think the last one was a gnome hat.  I've decided that elf hats are pointier  and taller than gnome hats.  It's my game and I'm making up the rules, darn it.


This picture was taken right after I finished felting it and placing it over a jar to dry.  Isn't it the cutest thing?  I just love making these.  They are so much fun.

I asked the Sweetie if he wanted another hat.  He told me I had already made him a hat, so he was good on that front.  I just don't get that.  Aren't scarves and hats like shoes.  It's OK to have many?  Once this dried, I asked if he would try it on.  He liked it!  Goofy point and all.  So now the Sweetie has a new hat.  And it makes me smile, because it is so silly in a not so silly world.

Another topic (ahem, read short attention span).

Here is my first red Roma tomato and cucumbers from my garden.  Yes, I know it's after Labor Day.  Apparently the garden thinks it's late July.  The only reason I have one truly red tomato is because we've had a week and a half of warm weather.  I'm talkin' temperatures in the 80's, kids.  Yup, the 80's.

Aren't they pretty?


I have a lot of these.


And a few of these. 


Let's see, for dinner tonight there's traditional fried green tomatoes with corn meal, tomorrow we will have tempura fried tomatoes, the next night buttermilk battered fried tomatoes...

Here's my butternut squash.  I'm not certain I will see the butternut color before frost comes.


I should know better than to attempt to grow tropical plants in my Northwest garden.  Silly, silly me.

Ta ta for now.

Tuesday, August 23, 2011

I'm Back

I have worked through my little crafting slump, by working through it. 

Yup, I worked on my sweater, ripped out rows, and worked on it some more.  Knit a buttonhole.  I am pleased to say I finished the piecing.  I need to seam everything together but first I needed to confirm that my work looked something like pattern pieces.


I was thrilled to see that the garter stitch trim lined up from piece to piece.  The blocking board certainly helps.


The sleeves match too!

For reasons I can't quite explain, I'm stuck.  I mean it looks like the pieces will fit together.  But what if they don't?  It's not like I can just get out the scissors and trim a little here or there, ya know?   Inertia.  Uggh.  I need to get over it and put this darn thing together.  Fall is just around the corner.

So ,I did what many people do.  When you should be working on one thing, start another! 

I began and finished (!!!) a little hat.  I have a giant bag full of scrap yarn.  A little of this, a little of that.  But not enough of anything to make a full project.  When at the yarn store earlier this summer I asked what I should do with it all.  One person said she makes a lot of striped hats.  I could do that.

I found a cute pattern (the Buggy Hat) from Morehouse Yarns Merino Knits. 


It was designed for little kids but a search through the Internet and presto I had the formula for converting a pattern into one that would work for adults.

I decided I wanted to make one in the round.  No seams. (because I have just confessed to a blockage in that area!).  I started on double pointed needles... six times.  Scrap that.  Back to the Internet.  Ta Da!  Learned how to use the Magic Loop.  Genius. 

I know how to add yarn in the same color, but I needed to learn how to add a new color.  Internet.  And presto, stripes.

Finally, the hat has a little i cord on the top tied in to a little knot so it sticks up.  Yup.  Internet.

And here it is.  Pretty cute, huh?  I used left over alpaca so it's yummy soft.


It's a little big.  I need to felt it down to a smaller size, which will tighten up the stitches and make it toasty warm.   With cool weather coming in about a month, I'd better get on that. 

...Or finish the sweater.


Tuesday, July 12, 2011

Knit Cap... to go with the scarf

I had a skein of yarn remaining after I finished my first ever knit scarf for the Sweetie.  I thought I would make a quick hat.

This would require that I learn the other stitch in knitting - the purl stitch.  Back to the cyberseams website to watch another video...about a thousand times.   I grabbed some left over yarn and decided to practice.

First ribbing where you alternate knit and purl stitches.  And the stockinette stitch.  Hey, cool.  It doesn't suck.  How cool is that?!


So, on with the project.  The pattern was also found on the cyberspace site  Basic hat.  Perfect for a rookie. I had to use ribbing, the stockinette stitch and figure out decreases.

And the end result... drum roll...


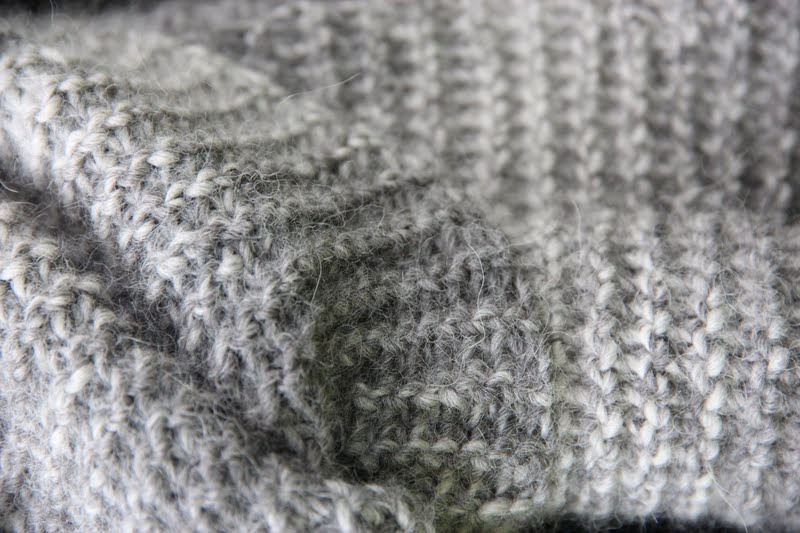
It's time for a  close up.  And if you've been knitting for 10 minutes more than me, you will see a basic flaw.  Which I discovered on another piece.  But that's a blog for another day...


Flaw or not, it's still super duper soft and I am thrilled that I have two stitches in my repertoire.  Whoo Hoo for me!

Sunday, July 10, 2011

Finished! My First Knitting Project

I blabbed to everyone that I was learning to knit.  It was going to be a practice piece.  I will swear on a stack of bibles that it is riddled with mistakes.  But I kept slogging along, and it became a little easier each time I picked it up. 

Then before you know it I couldn't put it down.  There was a certain rhythm to it.  And it didn't seem to take a lot of effort to 'make fabric'.  I was working on it in the yarn group on Wednesday's.  Then going to work on the bus.  Then on the bus home from work.  Then instead of reading before going to bed.  On an airplane.  In cars.  Instead of blogging.  It was crazy.

Somewhere along the way, the Sweetie decided he liked it.  He didn't have to.  After all it was a practice piece.  Full of errors.  So a scarf for Sweetie it became.  I didn't finish in time for his birthday, but within a couple of days.

I thought it might go nicely with this knit jacket he already owns.


Eco Duo is an undyed variegated yarn.  The colors are in longer runs than dyed yarns which provided for nice wide stripes fading into one another.


Of course, it is alpaca.  It has a lovely drape.  Perfect for this project.  And super soft.  


I gave it to the Sweetie right after I finished weaving in the ends.  He wore it around the house for about an hour - in June.  Must be true love... or extra points in heaven.

Monday, June 6, 2011

Learning to Knit

Wasn't it just yesterday I said I was going to finish WIP's before beginning anything new? 

I stretched the truth a bit.

I decided to teach myself to knit.  I was at the store because I needed a 1.5mm hook for the Lace Crochet Scarf project.  And there were all these books, and knitting needles in the next isle and yarn.  Recipe for disaster.

I thought, how hard can it be?  I'll just look it up on You Tube.  And off I went with my new crochet hook.

and some needles...

and yarn.

Then before work one morning, I wandered around the web until I found a couple of videos that made sense to me.  The ones by Cyberseams fit the bill.  The images were clear, the instructor went s l o w.  There was no talking, just music and a little bit of text here and there.  They demonstrate the throwing and continental methods.  I chose continental as you hold the yarn in your left hand similar to crochet. 

Sunday morning I decided to give it a whirl.  I was able to cast on - for the first time EVER.  That has been one of my biggest roadblocks.  Not being able to cast on means your project is not going to anywhere - at all - ever.

And I learned the knit stitch.  I played it over and over.  I started, I backed up, I almost have the music memorized.  They have a video for the continental version of the purl stitch but I am still working to get my head and hands around the first stitch.


My piece looks all wavy, but that's because I should have used longer needles.  Yeah.  That's it.

I showed my friend Lisa this morning.  She knows how to knit but she's a lefty, so I would be even more turned around if she showed me how to do it.  She laughed at me saying I was the only person she knew that used expensive yarn on a practice piece.  She's right.  But it gives me incentive to do a good job.

I chose Eco Duo by Cascade yarns.  It is 70% baby alpaca (my fave) and 30% merino wool.  It is super yummy wonderful soft.   Maybe being soft will compensate for my uneven tension.  That's my rationale at this point anyway.


So why learn to knit?  It seems the manly men in my life just aren't into all the lacy crochet stuff.  Huh, wonder why?  Knitting seems more adaptable  to making to manly men things. 

The things I do for my manly men.

Monday, May 30, 2011

Vintage Crochet Scarf and Hat - Finished!

Thank goodness I have listed gardening as one of the subjects of this blog.  Because that seems to have been my only topic of late.  I was feeling a smidge guilty about that for a little bit.  The thing is that weeds wait for no one.  You either spend time outside pulling them before they set seed or you spend a lot of time later when they multiply and spread. 


I have snuck in a few non-gardening projects, but they have moved along sooo slowly I have not blogged about them.


Friday evening I put the finishing touches on a  hat and scarf set.  I blogged about the scarf here.  But then it went into a black hole.  Not really, I just didn't blog about it.  I couldn't bring myself to commenting on "I added two more rows and they look fantastic".  That seemed silly, even for me.

So here is the finished product.

At first I wasn't sure how I wanted to finish it.  I thought tassels on the bottom of the points might be cute.  The pattern  added scallops around the edges.  Maybe I could give it a try and if I didn't like it, I could rip it out and go with my original idea.  Well, the scallops were totally cute, so no tassels.

I really wanted to make a hat next.  You might remember this pattern was for a baby blanket - not a hat.  I decided to add one more repeat of the main pattern and make a large rectangle.  Then I would add ribbing and and cinch the top together.  If it was too small I could always add a couple more rows to the body of the hat and ribbing.  Seemed pretty easy.


I used the tutorial written by Attic 24 for seaming the body of the hat and the ribbing.  It worked very well, and I think it will be more secure than if I stitched it together with a needle.  It also resulted in fewer ends to weave in.

The sweetie thought it needed a little something, so I added a tassel.  Good idea.  I think it turned out to be really cute.

Here is the set together.  Awwh.


Now I am on the hunt for some cute crochet mittens!  This has been a very fun project.  I hope you like it.

Monday, May 2, 2011

New Crochet Project - Vintage Crochet Scarf

Hi.


I didn't blog yesterday. 


I thought about it, but it was just too nice to be inside.  It was sunny and in the 60's.  Yup.  Like only the second or third time this year.


Hmmm.... Blog or putter in the garden.  The garden won.  It was fantabulous.  (Fantastic + Fabulous = Fantabulous.)  I am very sore.


So, a couple of weeks back I started a new crochet project.  Likely when I should have been doing something else.  Like vacuuming, or making dinner, or something.  Crochet is such a great procrastination thing for me.


Any who.  I am using a pattern I picked up from Churchmouse Yarns and Teas on Bainbridge Island last summer.  My folks had come over for a visit from WI and we stopped in Winslow before dinner with my in-laws.  I found this really cute pattern called Vintage Crochet Blanket.


Here's the image from their website.  I fell in love with how graphic it was with only the two colors.  There is a 10 color version, but that didn't say 'buy-me' in the same way.


Vintage Crocheted Blanket


The pattern had been languishing in a notebook, until I rediscovered it recently.  I had tried to start it once or twice last summer.  You know, just testing out the pattern with some stash yarn, but it wasn't meant to be.


So, a couple of weeks ago, I just happen to find myself at Acorn Street Yarn  (which is walking distance from my house!!) and I found just the stuff.  5 skeins each of  Baby Alpaca D.K. by Plymouth Yarn in red and black.  I never intended to make a blanket - just an scarf - so I tweaked the repeat to adjust for the narrower width.


I am happy to report that this pattern comes together very quickly.  Changing colors each row is a bit of a pain, but that's drama of my own making.  I mean, if it was really that big a deal I should have selected a different pattern.  I know, right?


So at last measure, Saturday, it was 7 inches wide and 43 inches long.  But I have worked on it since then.


I don't think I will end up using all 10 skeins so my next idea is to make a hat to match.  The stripe will go vertically, with black ribbing, and a pom pom.  It should be great!


This blog is supposed to be about trying new things.  With this post I think I took a giant step backward.  I mean, I 'm making a scarf - again.  And using Alpaca - again.  Maybe next project..


Now, onto more mundane things - like re hemming a pair of pants for work that seems to have 'come undone'.   But I am blogging instead - my second best procratination tactic!  

Thursday, March 31, 2011

Pink Japanese Flower Scarf - Finished!

I took this off the blocking board a couple days ago.  All I needed was some great pictures.  Alas, it has been gray and rainy all week.  It looks like the kind of weather where a person might still need a warm scarf like this. 

All around town the purple leaved plums are blooming.  They come out before the cherry trees.  The blooms are pink, the new leaves starting to come out out a dark, dark, purple, and the sky in Seattle is gray.  Perhaps this is the perfect scarf for this time of year!

The little flower.  It's it sweet?

The larger flowers.

I think it turned out very nicely.  Very soft and snuggly. 

Tuesday, March 15, 2011

New Japanese Flower Scarf

I've blogged about finishing my Japanese Flower Scarf while I was away.  I could have taken pictures of it while we were in Maui but alpaca and sandy beaches just didn't seem to go together very well.

I could have taken pictures over the weekend, but it poured rain and the lighting seemed dark.  Today while it was raining, I took a quick break and decided to block it.  Even with all the pins it looks so much better.

So what do you think happens?  The clouds clear late afternoon, early evening and the sun comes out.  I mean the real sun.  The kind that leaves shadows.  The kind that feels warm on your skin.  D'oh!  I could have blocked it over the weekend when it was yucky and I would've been ready to capture the perfect pic when the sun peaked out.  We will all just have to wait I guess.

When I finished the blue one, I started another.  This time in grey, dusty pink, and dusty purple.  Same delish alpaca yarn.  It is a super fun pattern and comes together so quickly.


I decided on a different layout for this one.  Instead of nesting the flowers together I placed them side by side.  Which leaves a good sized hole in the center of each 4 flower grouping.  I filled the hole with another smaller, layered flower.  And if I don't say so myself, I think it's pretty darn cute.

Here's a close up of the little flower.   Pretty and sweet.


And the bigger flower.  This will definitely need to be blocked, but right now it is relaxed, drapey goodness.  I have been much better about weaving in the tails as I go.  It looks much cleaner as I work on it and the task at the end is only a few ends rather than what feels like a gazillion.


And the Unusually Helpful Helper - Max.  Helping.


Max thinks yarn is the best thing... ever.  See how helpful he is?


With all of this help I decided to wrap up the photo session a little early.  I went into my office/guest room/project room to download my new pics.  And my Unusually Helpful Helper decides to lie on the un-pinned portion of the blue scarf! 

Dude!  You've already had loads of pets and snuggles today. 


Thank goodness I am not paying for this kind of assistance.

Monday, February 28, 2011

Japanese Flower Scarf

There's a cute crochet pattern that's recently caught fire with the crochet crowd.  It's been around for awhile, but you know how it is.  A couple of key people catch wind and suddenly there's a buzz.

Awhile back I was in the fabric store looking for small sharp scissors for applique work.  I know, I can't understand why I didn't have any either.  My small scissors have the rounded ends of children's safety scissors.  Great for cutting thread and yarn ends but not much else.

Anyhoo, the store had a yarn section so I thought I would do a quick tour.  I mean, just you never know.

Buying yarn is a tactile thing for me.  It must be soft.  Most wool is itchy to me, even merino.  I lean toward silk, alpaca, mohair, cashmere blends.  I'm a huge natural fibers fan when it comes to yarn.  I try to avoid acrylics and stuff like that.  Odd really, considering the amount of fleece we wear in our house, which is about a unnatural as you can get. 

So there I am, wandering through the couple isles, touching yarns that have promise and I find it.  Debbie Bliss Andes.  An alpaca, mulberry silk blend. Oh my gosh.  It was so soft I rubbed it against my cheek.  Oh my gosh it felt good.  Oops I already said that. I just had to have it.  So I bought a few skeins.  No project in mind.  Just to add to my stash.  Just in case.  Something might just come along.  Just sayin'.

Later I am wasting time in blog land and I find these gorgeous images on the Attic 24 site.  Lucy had found a fabulous pattern using the same yarn I had purchased.  I love  her stuff although our color palette is very different.  There it was. I had a project.  Me and about a million other people on Ravelry.

Oh wait, I already have a couple of crochet projects in the works.  I had intended to finish those up first.  I work a little on weaving in the ends on a purple scarf - that's all that remains on that project.  And I work on the mohair scarf project for awhile.  And I work on some quilts.

When I run low on the white mohair, I head to my go-to yarn shop, Acorn Street Shop.  They have Debbie Bliss in different colors.  I pick up a few more to add to my stash.  When I get home I start playing around with color combinations.  Before you know it I am off to the races with my newest project. 

Here's the name of the book where the pattern can be found:  MOTIF BOOK VOL 4 - Japanese Crochet Book, which can be found on eBay and Esty sites.  It's in Japanese, but if you can read crochet diagrams you will be on your way in no time.  In my opinion (like noses, everybody has one) diagrams are easier to follow than the crochet shorthand and abbreviations found in most crochet patterns. 


The pattern works up very quickly.  Especially the first two colors.  The image is in focus, it's just a soft, fuzzy yarn, with a beautiful sheen.

 I also found some tutorials on something called the Magic Circle, which eliminates the donut hole in the very center of the project.  It's easy and super cool.  Love this tutorial.


The third color takes a little longer, but you connect the flowers as you go so there won't be a big project at the end.  I've also tried to be better about weaving in the ends as I go.

I hope to be able to show the finished project soon.  I have added considerably to the length since I began the project a couple of evenings ago.